You Dirty Rat - Super Fucking Rebuild (pic heavy)
Posted: Wed May 11, 2011 4:24 pm
Yeah, so I went a little overboard on this one. 
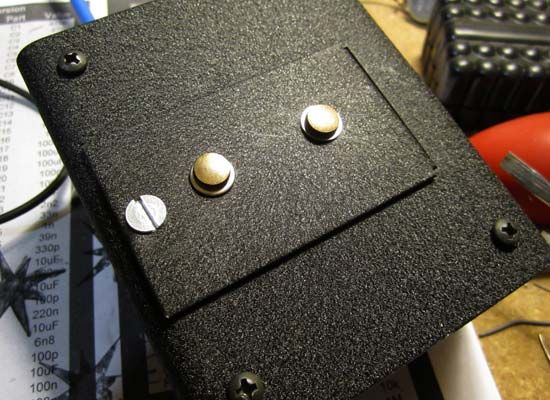
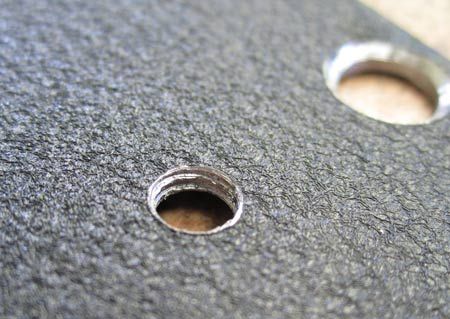
Got a You Dirty Rat with a "broken" battery door (turns out just the screw was missing) for cheap on TGP. First step was to fix the battery door. I happened to have a sheet metal screw that was the right size for the threads (10-24, apparently), but it was way too long, so I cut it down to size with my Dremel. Then of course, the flange of the head was too wide to sit flush in the hole, so I drilled out the existing hole a little bigger and then counter-sunk the hole so the screw would sit (pretty close to) flat. Nice.
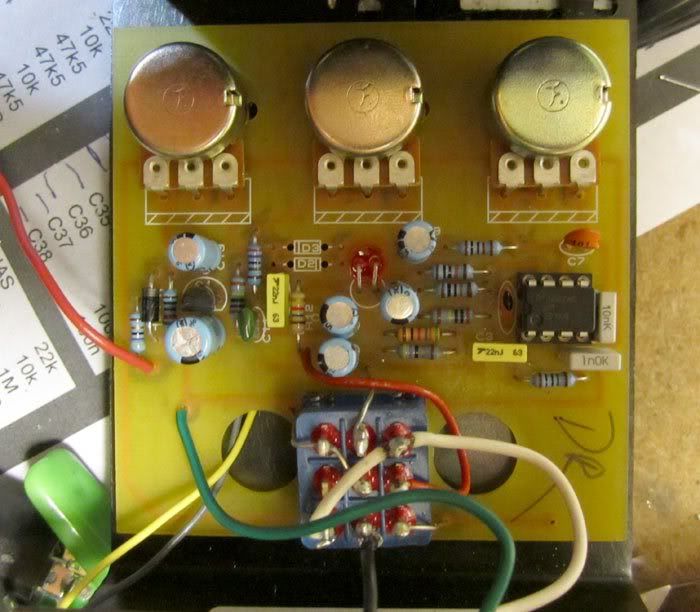
Then I was thinking I'd replace most of the PCB parts as I did recently with a Rat 2. Did pretty much the same thing: replaced most of the carbon film with metal film, and put some box caps in there. Also socketed the IC and put a LM301 in there. Cherry.
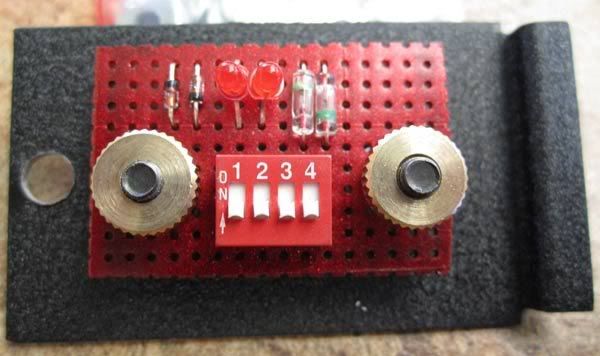
And then I thought it would be cool to add clipping diode choices, but I didn't want to drill up the case and "Keeley it" all up ugly style. So that means an internal daughter-board and some kind of switching system. I happened to have a 4x DIP switch bank laying around, and that seemed like a good thing to work from. I also wanted relatively easy access, so I figured attaching this board to the battery door made sense. I pulled the battery clip off, as it is only held on with double-sided thick tape. Hmmmmm.
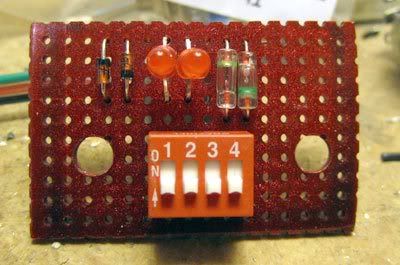
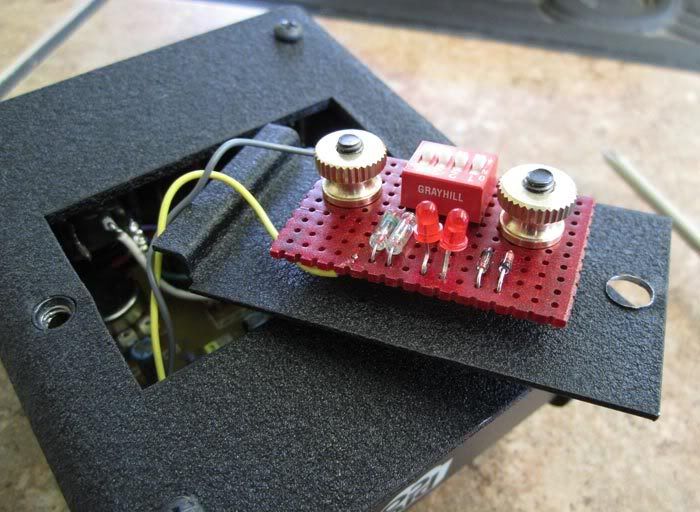
I made up a small perfboard layout with the DIP switch bank and three sets of diodes: silicon, LED, and germanium. That basically means I can choose between classic, Turbo, and You Dirty options. Also, DIP switches are all SPST, which means when all of the switches are off, I get just the op amp clipping. So really there are four options. Okay, so there are four DIP switches, but only three diode options. I couldn't figure out how to anything else with just SPST, and another diode option seemed sort of silly since they sound somewhat similar anyway. So I just wired the LEDs to #2 and #3 switches. With two sets of DIPS, I could probably rig up individual diode selection and symmetric/asymmetric options, but I only had one DIP on hand, so that's what I got.
Yeah, that's a sparkly red perfboard. I painted it. Why not go all out?
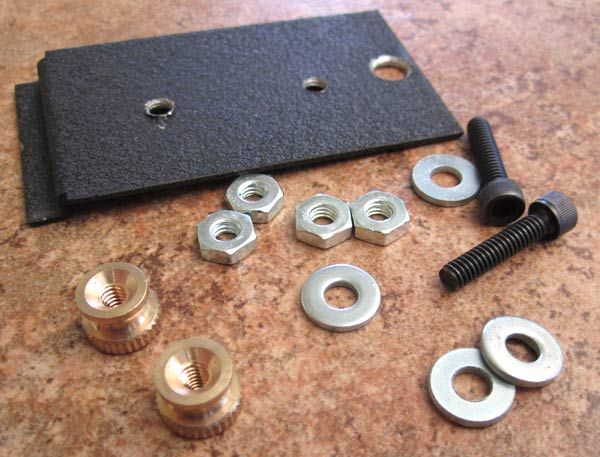
Anyway, I didn't have any of the white plastic sticky-back standoffs, and they're kinda weak-ass anyway on such a diesel pedal, so I figured I'd go with metal standoffs. Obviously, the battery door didn't come ready for standoffs, so I had to drill some holes to match the daughter board.
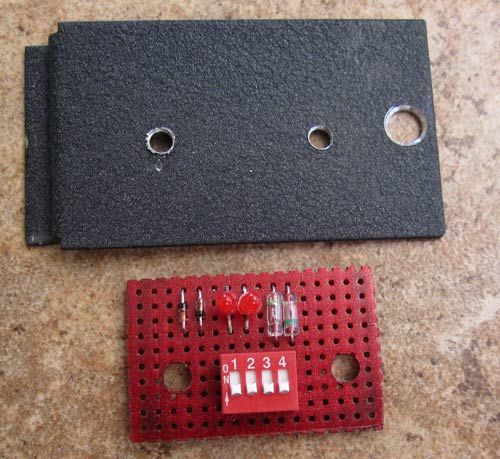
Then I figured that while I was at it, I'd tap the holes so that they would be threaded. It's totally overkill when you're using nuts/washers to secure things, but again, I figured what the hell. So I tapped out the holes for 8-32 machine screws.
While I was at Lowes getting some cool black hex-head screws, I saw that they had 8-32 brass thumb screws nuts. Shazam. I'm all over that like a hippie on Doritos.
And here it is mounted on the battery door:
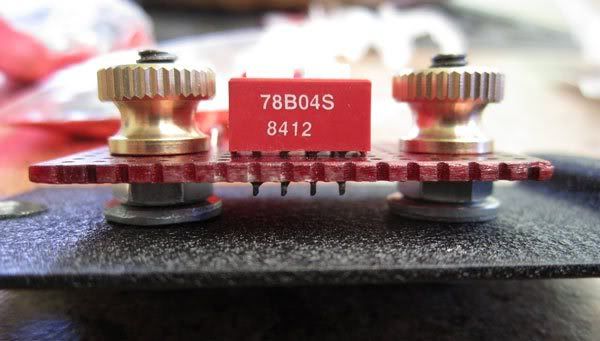
And now soldered up and ready to rock:
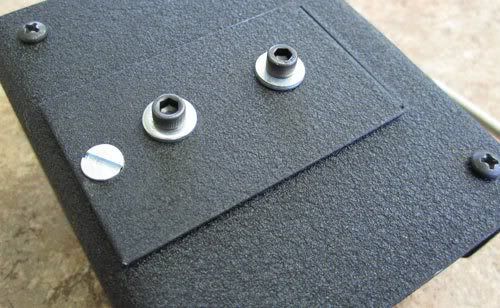
All done up. The choad monkey that owned this pedal before me didn't include the big rubber feet, so right now the hex heads keep it from sitting flat. I've got a new set of feet on order, so hopefully in a few days I'll have it 100% complete. I also need a couple neoprene washers on the daughter board to make the nuts bite in a little tighter (har-har). All that metal-on-metal makes it hard for things to stay tight over time.
Anyway, now I have a pedal that looks like a dead-stock You Dirty Rat, but that is actually so bad-ass that it needs its own zip code. Questions?

Got a You Dirty Rat with a "broken" battery door (turns out just the screw was missing) for cheap on TGP. First step was to fix the battery door. I happened to have a sheet metal screw that was the right size for the threads (10-24, apparently), but it was way too long, so I cut it down to size with my Dremel. Then of course, the flange of the head was too wide to sit flush in the hole, so I drilled out the existing hole a little bigger and then counter-sunk the hole so the screw would sit (pretty close to) flat. Nice.
Then I was thinking I'd replace most of the PCB parts as I did recently with a Rat 2. Did pretty much the same thing: replaced most of the carbon film with metal film, and put some box caps in there. Also socketed the IC and put a LM301 in there. Cherry.
And then I thought it would be cool to add clipping diode choices, but I didn't want to drill up the case and "Keeley it" all up ugly style. So that means an internal daughter-board and some kind of switching system. I happened to have a 4x DIP switch bank laying around, and that seemed like a good thing to work from. I also wanted relatively easy access, so I figured attaching this board to the battery door made sense. I pulled the battery clip off, as it is only held on with double-sided thick tape. Hmmmmm.
I made up a small perfboard layout with the DIP switch bank and three sets of diodes: silicon, LED, and germanium. That basically means I can choose between classic, Turbo, and You Dirty options. Also, DIP switches are all SPST, which means when all of the switches are off, I get just the op amp clipping. So really there are four options. Okay, so there are four DIP switches, but only three diode options. I couldn't figure out how to anything else with just SPST, and another diode option seemed sort of silly since they sound somewhat similar anyway. So I just wired the LEDs to #2 and #3 switches. With two sets of DIPS, I could probably rig up individual diode selection and symmetric/asymmetric options, but I only had one DIP on hand, so that's what I got.
Yeah, that's a sparkly red perfboard. I painted it. Why not go all out?
Anyway, I didn't have any of the white plastic sticky-back standoffs, and they're kinda weak-ass anyway on such a diesel pedal, so I figured I'd go with metal standoffs. Obviously, the battery door didn't come ready for standoffs, so I had to drill some holes to match the daughter board.
Then I figured that while I was at it, I'd tap the holes so that they would be threaded. It's totally overkill when you're using nuts/washers to secure things, but again, I figured what the hell. So I tapped out the holes for 8-32 machine screws.
While I was at Lowes getting some cool black hex-head screws, I saw that they had 8-32 brass thumb screws nuts. Shazam. I'm all over that like a hippie on Doritos.
And here it is mounted on the battery door:
And now soldered up and ready to rock:
All done up. The choad monkey that owned this pedal before me didn't include the big rubber feet, so right now the hex heads keep it from sitting flat. I've got a new set of feet on order, so hopefully in a few days I'll have it 100% complete. I also need a couple neoprene washers on the daughter board to make the nuts bite in a little tighter (har-har). All that metal-on-metal makes it hard for things to stay tight over time.
Anyway, now I have a pedal that looks like a dead-stock You Dirty Rat, but that is actually so bad-ass that it needs its own zip code. Questions?