Page 54 of 409
Re: Let's see your finished DIY projects!
Posted: Tue May 03, 2011 6:55 pm
by frequencycentral
mathias wrote:
Hey! That's my SHO layout! Cool!
Re: Let's see your finished DIY projects!
Posted: Tue May 03, 2011 7:00 pm
by mathias
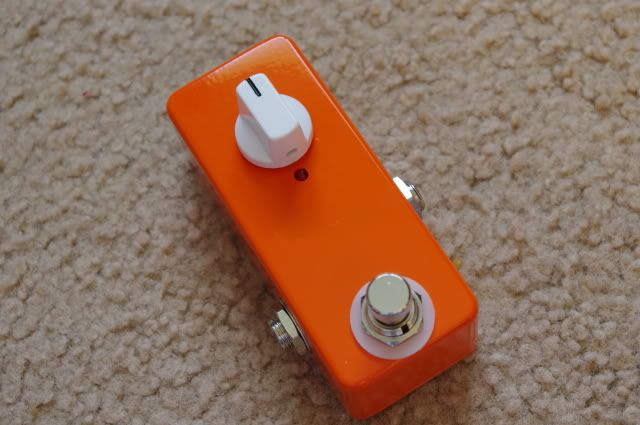
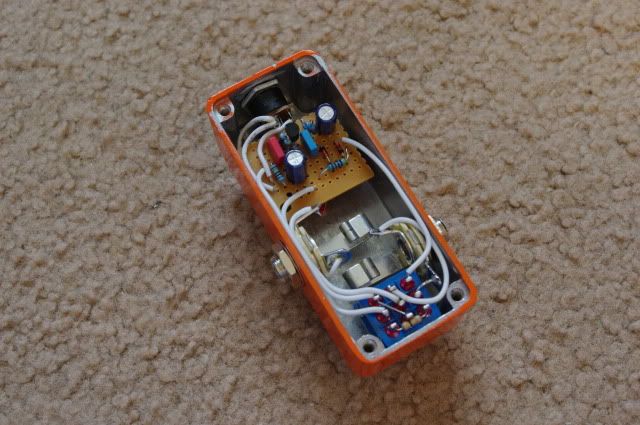
Yep! Good eye. I took it and downsized it by standing everything up the resistors and diodes on perfboard rather than printing a PCB, though.
I may yet print & etch a PCB for the second pedal.
Originally I was going to solder it to the pot's pins (which are the kind with a 90 degree bend in them already) but it wouldn't have fit, so they got some wire instead.
Re: Let's see your finished DIY projects!
Posted: Tue May 03, 2011 10:32 pm
by Jero
I bought one of those tiny enclosures recently, but haven't decided whats going inside...or if I'm ready for that tight of a squeeze. Kudos to you guys for jumpin' right in.
Re: Let's see your finished DIY projects!
Posted: Wed May 04, 2011 10:59 am
by mathias
Klon buffer, without a stomp switch, to drive long cables to the amp are probably the easiest and thing to stuff into one of those 1590a cases. Or even simpler: an amp channel switcher, expression pedal knob, etc.
Re: Let's see your finished DIY projects!
Posted: Wed May 04, 2011 11:46 am
by eatyourguitar
If u eliminate the pot you can squeeze 2 perf pcbs on top of each other. Just use an external pot while its all open on the bench so u can match the volume of the bypass. Then replace the pot with a resistor of the measured value. You could fit tb, ff, rangemaster. A small internal trimmer would also work. Have you seen those trimers with the little plastic wheel. You could cut a slit in the side for the wheel.
Re: Let's see your finished DIY projects!
Posted: Wed May 04, 2011 11:55 am
by mathias
Or mount a photoresistor (CdS cell) on the top in place of a knob and a super bright LED.. waving your foot over the pedal would change the resistance of the CdS cell, changing the effect in place of whatever pot it replaced! That said, it turns out to take a lot of testing and math to get the resistors right with a given grab bag of CdS cells to match a pot value in most lighting conditions. You can put a trimpot in there, but you're not going to open up the pedal at the start of a gig to adjust the trimpot because a given stage has a bunch of flood lights aimed at you, etc.
Re: Let's see your finished DIY projects!
Posted: Wed May 04, 2011 12:50 pm
by eatyourguitar
photocells are a pain in the balls. all my experiments were crappy. good photocells or vactrols can get up to $6 - $9 each. it depends on the circuit. an eye for tremolo speed is cool cause there is no way to screw it up. even if the photocell isn't doing exactly what you want, you still have a nice tremolo effect.
Re: Let's see your finished DIY projects!
Posted: Wed May 04, 2011 3:56 pm
by Jero
All good ideas! I actually made an effects switch for my silvertone in one of those, but that was super easy being a stereo jack and 2 switches. Then I bought a stereo cable for it so I wouldn't have to have one hard wired.
You could also drill holes for the trimmer so a pot doesn't have to be mounted outside. I have a couple trimmers that have these little plastic posts you put into them to make turn shafts. Pretty neat.
Re: Let's see your finished DIY projects!
Posted: Thu May 05, 2011 9:19 am
by eatyourguitar

like this but on the side with the wheel barely visible. that way it wont break but you can still adjust it without opening the case. you might use your fingernail for adjustment. or you could put a piece of tape on it if your worried about loosing your setting and it wouldn't look super ugly with a huge piece of tape on top all over the knobs.
Re: Let's see your finished DIY projects!
Posted: Thu May 05, 2011 11:51 am
by ARC Effects
Got a fresh one.
COT50 - Awesome circuit with a very nice Marshall/Vox vibe to it, I definitely recommend you guys make one of these.
The LED placement is a little funny because the vero is mounted to the pot and the led is on the vero (I hate doing LED's offboard)
Re: Let's see your finished DIY projects!
Posted: Thu May 05, 2011 12:30 pm
by mathias
StupidDream -- I usually drill a hole next to the footswitch, put the LED in and solder one of the legs to the footswitch pin. Then I pull it out, and hot-glue the rest of the LED leg to the side. Sometimes I'll put a dab of hot glue behind the LED, too,but that's going to be hard in these little 1590a cases. You could use a stronger glue on the LED leg, too, like nonconductive epoxy (don't use JB weld! heh.)
jero & eatyourguitar -- I like the trimmer idea, too. I actually thought about putting a DIP switch
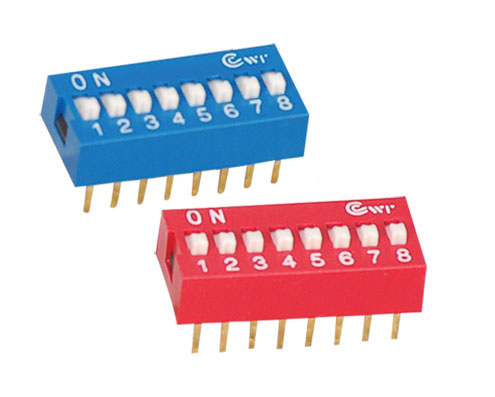
on the side, accessible by a slot, rather than use toggle switches for a more complicated pedal (looper circuit that isn't really working). That coupled with trimmers you can adjust through a hole would be a neat little stealth pedal. I also just remembered that the Tech21 Sansamp had these dip switches for a long time. (Now I got teh kurtz...)
Re: Let's see your finished DIY projects!
Posted: Thu May 05, 2011 2:59 pm
by McSpunckle
Jero wrote:All good ideas! I actually made an effects switch for my silvertone in one of those, but that was super easy being a stereo jack and 2 switches. Then I bought a stereo cable for it so I wouldn't have to have one hard wired.
You could also drill holes for the trimmer so a pot doesn't have to be mounted outside. I have a couple trimmers that have these little plastic posts you put into them to make turn shafts. Pretty neat.
Keep in mind that a lot of trimmers have a rotational live of ~250 cycles, generally... compared to 10,000 of an average pot. So don't use them in place of a pot. They should only be used to "tune" the circuit.
Re: Let's see your finished DIY projects!
Posted: Thu May 05, 2011 3:27 pm
by mathias
That could be a problem really quick. I bet those DIP switches have a duty life of roughly the same. (Several hundred switchings, then the contacts / cheap plastic is shot.)
We've got a couple dozen different types of 8-turn/10-turn pots at the Makerspace, some of them designed for industrial applications where you need really fine control of something to dial it in. (A member was recounting his time working for Texas Instruments, when they lithographed chip designs using a giant machine, and the analog-to-digital converter was composed of a bunch of matched transistors and a bunch of 10-turn fine control knobs.)
One of the pots we have (some japanese manufacturer) has a diameter of about 3 inches and 10 turns.. built like a tank.
edit: unrelated: since I don't want to really go into business making and selling pedals (or other guitar gear) would anyone building DIY projects find usefulness in a service that drilled enclosures for you to your specifications? I know theres' a couple places that do this already. I was just thinking about building a CNC drill press / mini-mill for this purpose, since the Makerspace already built a wood router CNC machine, and we're on a roll... Could drill more exactly, quickly, and safer than operating a drill press in your kitchen

Re: Let's see your finished DIY projects!
Posted: Thu May 05, 2011 4:25 pm
by McSpunckle
YES. A MILLION TIMES YES. I WANT CNC'd ENCLOSURES.
Also, I was browsing through Mouser and found that there are a few 10000 cycle trimpots available. You gotta look for them to have a carbon element. Or just check the datasheet.
Re: Let's see your finished DIY projects!
Posted: Thu May 05, 2011 4:28 pm
by mathias
Let me talk to the Makerspace folks and get back to you. We already have DIYed a wood router CNC table and a CNC PCB-cutting/engraving machine. I may be tempted to simply acquire another bridgeport mill for the Makerspace to turn into a CNC setup. We can get lots of used industrial tools cheap here, rustbelt and all
